
Given the performance levels of current generation motorcycles, you have probably discovered that your road riding experience these days is dominated by the feeling of frustration at not being able to use your machine to anywhere near its full potential, without being in constant fear of losing your licence.
If you have supplemented your road riding with some ride days, are running in the fast group and now find you spend most of your day at the local track being held up by slower traffic, then the logical progression is to have a go at racing. The good news is that if you own a late model sports bike or nakedbike, then you already have a great base from which to build a competitive racing motorcycle by carrying out some reasonably straightforward improvements.
This guide is designed to take you through the modifications required to convert your existing road bike into a race specification machine, and covers a range of performance levels to suit your budget and skill level.
The bike you start with is really going to determine how important engine modifications are to your lap times. If you are running a late model 1000cc bike and you’re starting out in racing, then you can’t fully utilise the 162bhp your stock bike has.
If you are running a 600cc machine then more horsepower could definitely give you an advantage, especially in passing down the straights during a race, so your requirements may be different. I’m going to break this down into a number of stages, and if you’re inexperienced then I really recommend keeping engine mods to a minimum and spending your dollars on suspension setup, weight reduction and practice, as that is where you will find the biggest improvements.
Stage 1 – Bolt-ons
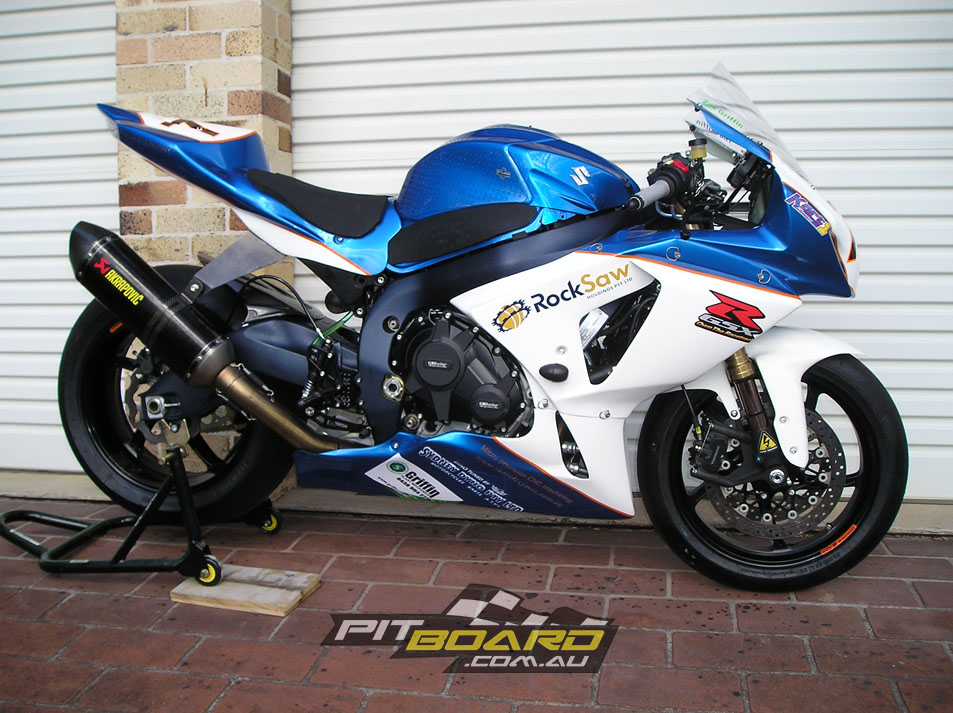
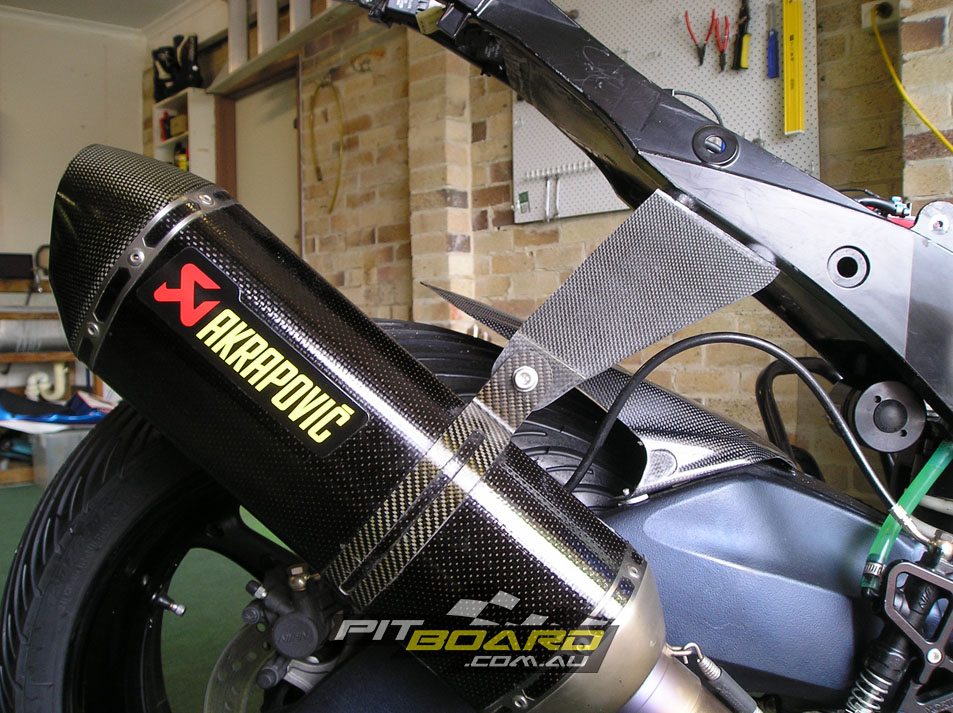
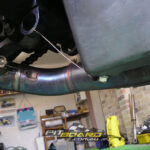
The obvious starting point for engine upgrades is to use off the shelf parts that do not require the engine to be rebuilt. As a start point a slip-on muffler ($250-$800) or Stainless Steel full race exhaust system ($1200-$2000), race airfilter ($80), plus a Power Commander and map from a reputable dyno room ($800-$1200), will get you around 170HP at the back wheel on a late model Japanese 1000 and a good clean torque curve right through your acceleration zone. This is really all you need to do to your engine until you are running top 15 in one of the major Australian Championship classes.
Stage 2 – Light internal mods
If pulling your engine out and taking the head off is not too scary for you, then a relatively simple and cheap mod is to install a thinner head gasket ($200), which will give a noticeable improvement in torque and throttle response, and brings your power up to around the 175HP mark. At this stage I’d also look to add a quickshifter ($350-$600), which not only improves acceleration but also allows you to “spend” valuable concentration in other areas.
Stage 3 – Getting serious
If a 200hp monster is what you really must have, then serious engine work is the only way to get there. This is going to require camshafts ($1200-$1800), a CNC ported head and multi angle valve job ($1500-$2000) plus possibly machining of the pistons, blueprinting and labour ($1500-$2500). Alternatively you can drop your motor off to someone like PTR Racing or Motologic and just ask them to build you an ASBK spec motor ($6,000-$8,000).
Suspension
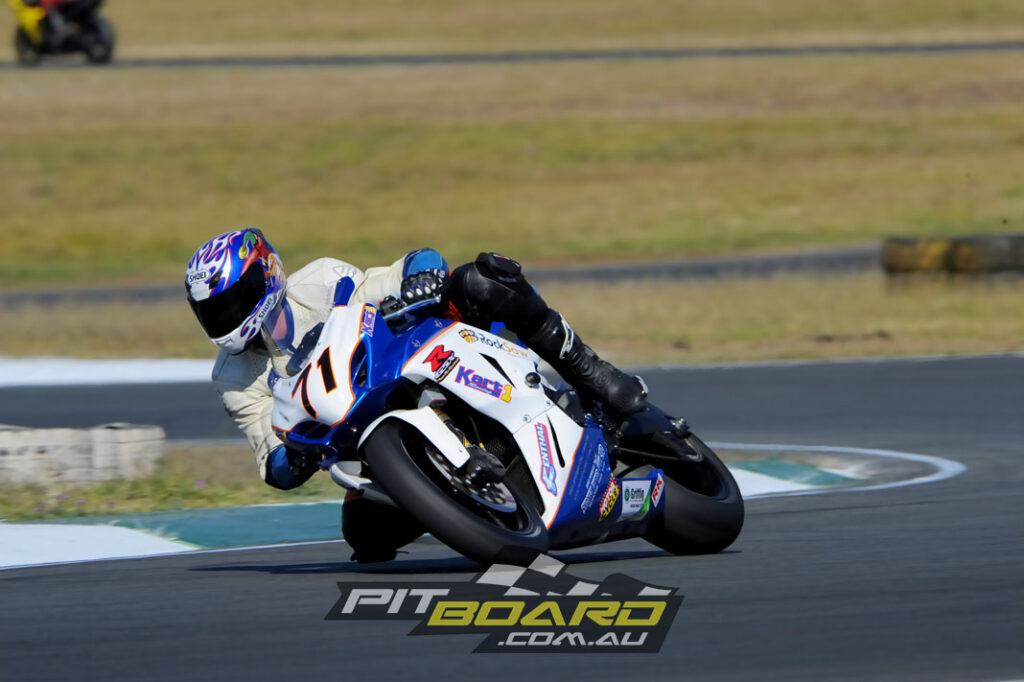
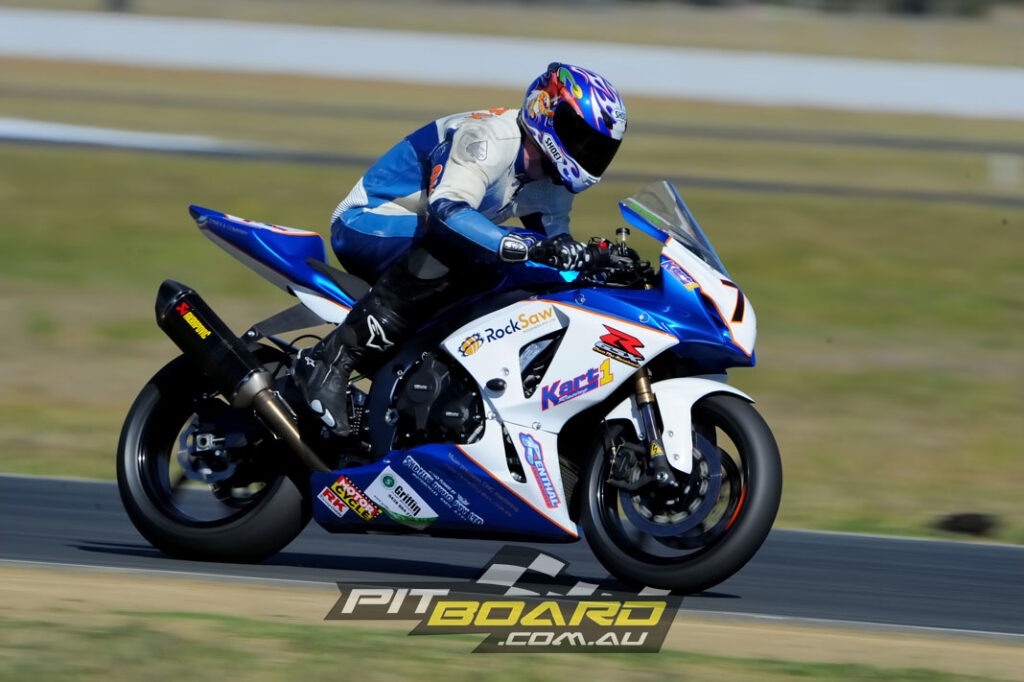
This is an area where correct setup is critical to lap times no matter what type of machine you ride. If there is one area of bike preparation on which to focus, this is it. Poorly set up suspension will not only be the biggest barrier to improving your lap speed, it could also land you in hospital and see your pride and joy being carted home in a wheelbarrow.
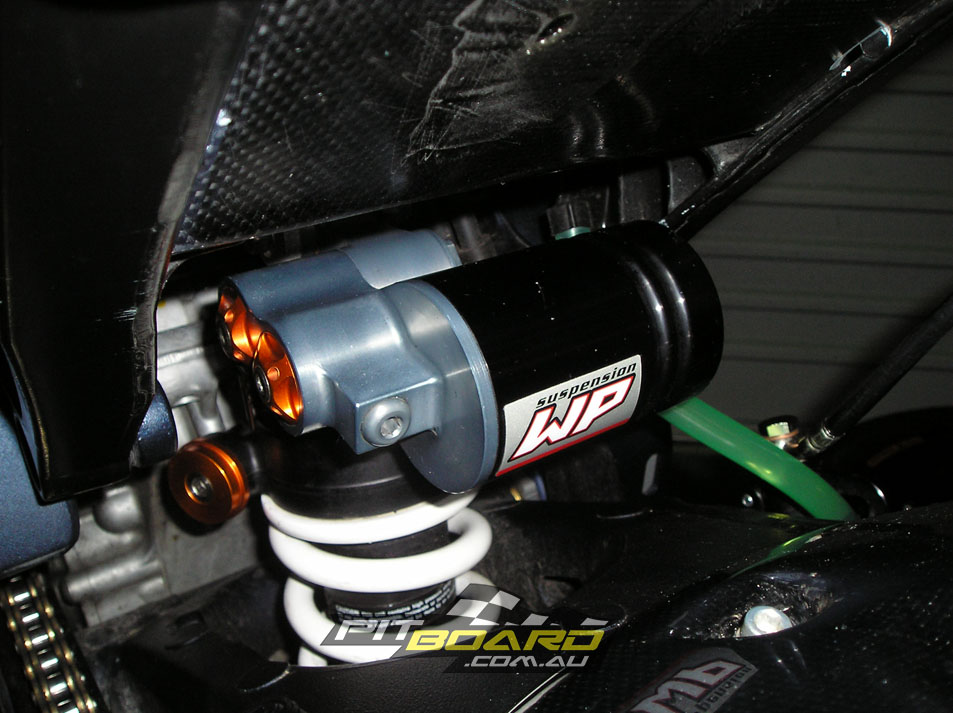
Again there are a range of options here and buying the most expensive Ohlins WSBK kit is not necessarily the answer. Installation of the correct springs for your weight and an after market valve kit into your stock forks and shock ($800-$1200) by a reputable specialist such as Terry Hay’s Shock Treatment will make an enormous difference to lap times and allow you to find your limit more safely. You should also add an aftermarket steering damper ($250-$500) to keep those headshake issues under control as your new motor has the front wheel pawing at the sky.
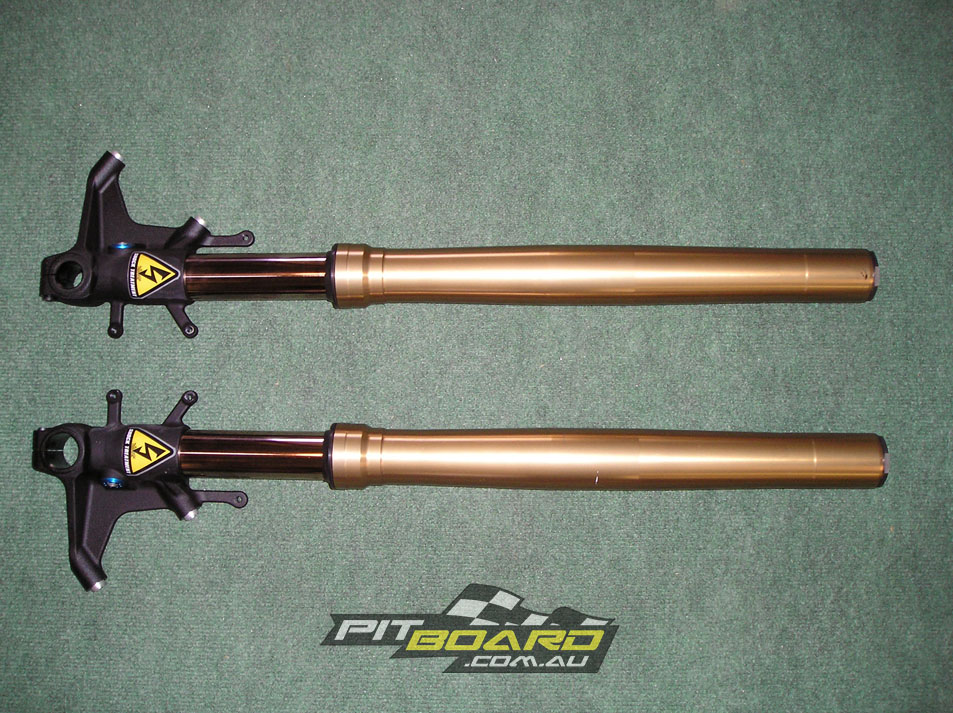
Next in line on the suspension upgrade list are race specification fork cartridges from Race Tech ($1200) or Ohlins ($1800), plus an aftermarket Shock ($1400-$2000), which will provide further improvement. If you want to get really serious then a set of SBK specification gas charged Ohlins or K-Tech front forks ($13,000-$16,000) will certainly make you the envy of all in pit lane, just don’t forget the factory technician to service and set them up.
Brakes
Most of the national classes in Australian racing are quite restrictive in terms of the modifications you can make to the braking system. Modern sports bikes do have extremely efficient brakes as standard, however they are set up more for road use than the repeated high load requirements found during a circuit race.
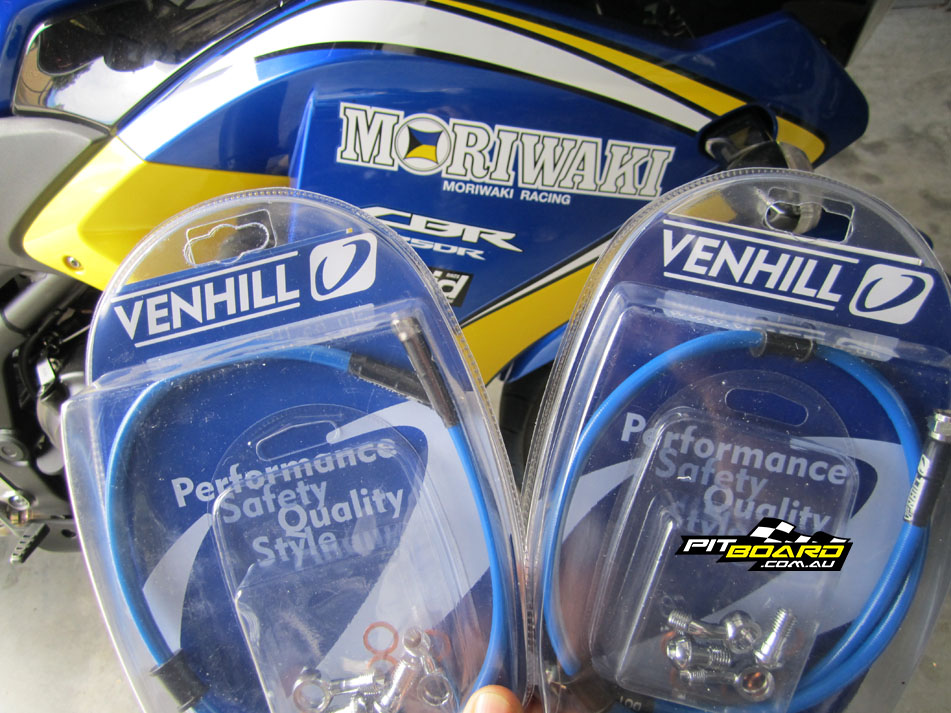
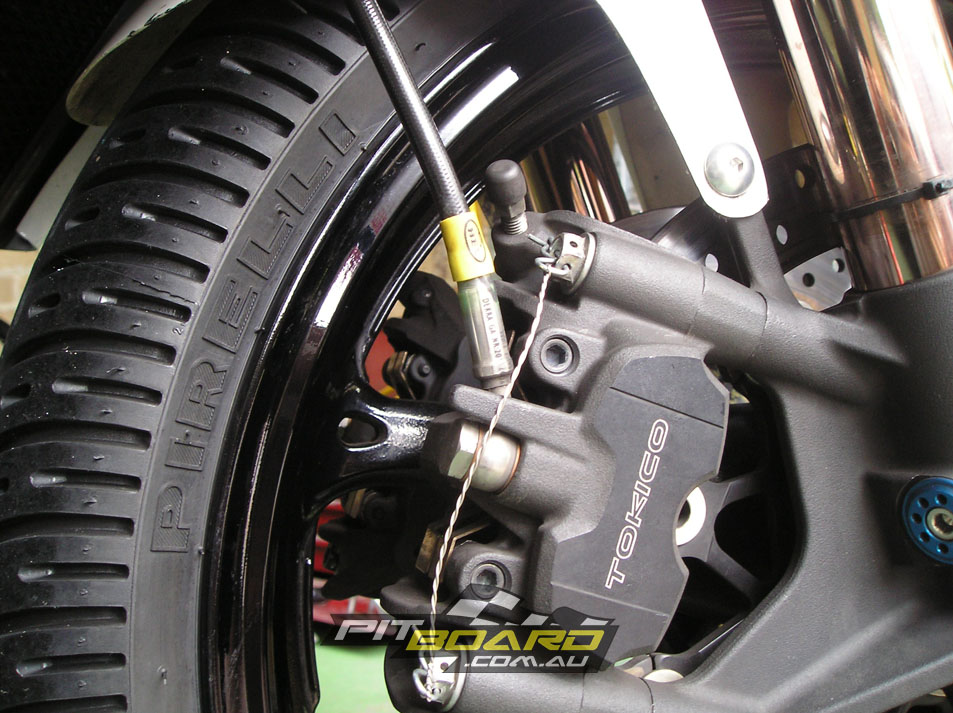
You can achieve significant improvements and a very good braking package by simply adding braided front brake lines from an aftermarket supplier such as HEL, Galfer or Goodridge ($80-$150) and some race specification pads ($50-$200).
In choosing pads there are a huge amount of options out there. I personally use Performance Friction pads, and have found them to be excellent, however others have achieved equally good results with products from EBC, Brembo, SBS, the list goes on.
Last but not least is some high performance brake fluid. What you are looking for here is a high wet boiling point. Castrol’s SRF ($160/L) is probably the most popular choice out there, but I have also had excellent results from Motul RBF 660($30/500ml). These three modifications will give a substantial increase in feel and braking power over the stock road setup, and most importantly they will dramatically reduce the amount of “fade” you experience towards the end of a race.
If the rules allow then an upgraded front master-cylinder should be next on your shopping list. Brembo offer an 18-20 x 19 RCS option ($400-$500), which allows adjustability between increased feel from the 18 ratio and a stronger bite using the 20 option. This is great if you are new to the race scene and aren’t yet sure what you prefer, and it’s not substantially more expensive than a non-adjustable aftermarket master-cylinder. The performance increase from a master-cylinder change will depend on how good your stock system was to begin with, however I did notice a substantial improvement on my GSX-R1000 from the Brembo MC.
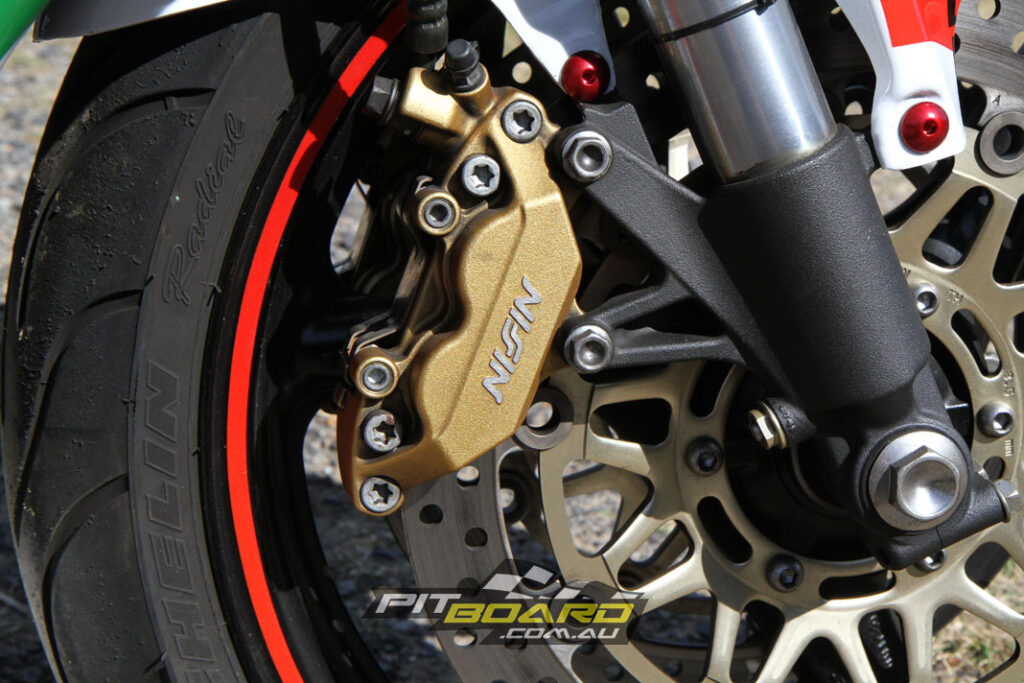
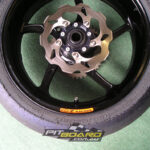
If rules and budget are not restrictive, then it’s time to look at some aftermarket rotors and calipers. On the rear I normally just run a wave type rotor ($150-$250) to save approx 100g of rotating mass and leave everything else stock, as I rarely use the rear brake unless I’m off in a gravel trap! On the front you can look to a wave type setup from Galfer or Braking ($600-$800), however most of the front running teams are still using traditional circular rotors from Brembo ($800-$1500).
For callipers Brembo have a range of options starting at their cast entry level items ($1000-$1500/set) and progressing up to their ultra trick race specification billet Monoblocs ($6000-$8000/set).
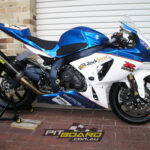
Bodywork
Replacing your stock bodywork with something more suitable for track use is highly recommended and due to the rules for most series stipulating a bellypan able to hold a certain amount of fluid, pretty much essential. Aftermarket fairings made from fibreglass ($800-$1200) or carbon-fibre ($2000-$3000) will save a substantial amount of weight from the heavy stock plastics and are also much easier and cheaper to repair if you happen to have an off. At this time I would also suggest picking up a slightly damaged tank from a wrecker if you can find one at a reasonable price ($350-$700), as replacing a stock tank is a very expensive exercise if you want to return your bike to road trim down the track.

Other items on the bodywork list include fibreglass/carbon-fibre air-intake ducts, tank cover, chain guard and rear hugger. All these items will be lighter in fibreglass or carbon-fibre and will also be cheaper than replacing damaged OEM components. While you are doing the bodywork consider moving to an aftermarket screen from Zero Gravity or Puig ($80-$150) and I would recommend a double bubble unit if the rules in your class allow. Again this will be cheaper than replacing an EOM item if it gets damaged and a double bubble design reduces buffeting immensely when you pop up to hit the brakes at the end of the straight.
Some fairing suppliers now offer to supply your race bodywork with the gel coat pre coloured to your requirements. The finish and tone may not be as good as quality paintwork, however it is a very cost effective way of having some colour on your bike and with the addition of a few stickers will still look fine from 10 metres away. If you want a full custom paint job then prices can vary widely ($500-$2000) depending on the complexity and quality you require.
Weight Reduction
Weight is the enemy of just about everything that makes a motorcycle go fast around a racetrack. Acceleration, braking and cornering performance are all hugely effected by the overall weight of the bike and any reductions can have significant benefits in reducing lap times and also tyre wear. Depending on the rules in your class you may be quite limited in what you are allowed to change on the bike and may also have a minimum weight limit, however here are some things you can do if the rules allow.
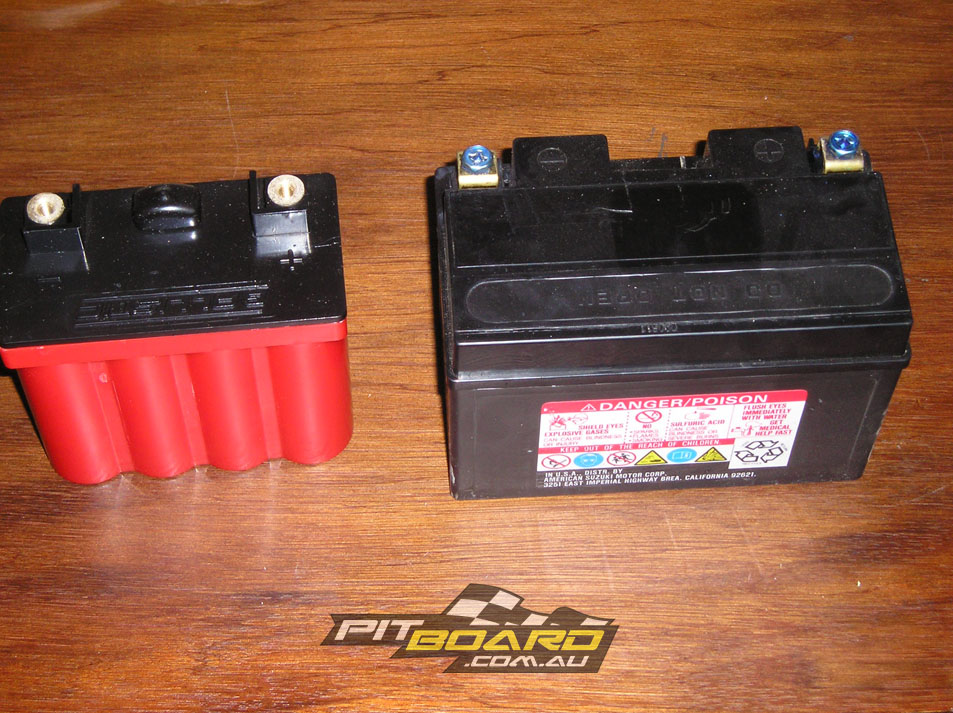
Probably the easiest and best bang for your buck weight reduction item available these days comes through replacing the stock lead acid battery with a much lighter and smaller Lithium-Ion unit ($200-$400). This will save multiple kilograms for the price of a few hundred dollars and let me tell you, the top WSBK teams are spending thousands to save a few grams by the time they get to the end of weight reduction programs.
Next on the list are lightweight aluminium alloy fasteners. You would be shocked to find out how many nuts and bolts there really are on a motorcycle and to say you could replace somewhere in the region of 150-200 steel bolts with aluminium would not be overstating it. Just don’t get too excited with this, structural bolts such as engine mounts, brake calliper mounts, triple clamp bolts, etc should all be left off the alloy replacement list. You do not want to have a brake calliper bolt shear through when you hit the anchors at over 280km/ph into turn one at SMSP!
Still on fasteners you can spend hours knocking off the spare 3-5mm of thread on the end of structural steel bolts, and drilling out hollow bolts for items such as the subframe mounts to an extra 1mm oversize. I was once talking to the owner of a well known performance shop about this type of work and his attitude was, “Just go and have a piss before you race, it will save more weight than drilling out that bolt”.
“Well yes and I do but you can only have one piss and all these little things add up to make a big difference when you multiply it by 200.”
Speaking of sub-frames, alloy aftermarket race units are available for most sports bikes ($500-$800). Alternatively you could save quite a bit of weight here by reducing the amount of brackets in the stock item, and replacing the heavy plastic OEM undertray with fibreglass or carbon-fibre unit, although you may have to make this up yourself as I haven’t found suitable items to be readily available off the shelf.
If budget and class rules are not a problem then a set of lightweight aftermarket wheels are possibly the most significant weight reduction item you can add, due to the fact that any weight saved here is both unsprung (improved suspension action) and rotating (improved handling, acceleration and braking). Aftermarket aluminium rims are the most cost effective option ($1500-$2500/set) and should provide a small but noticeable improvement over OEM. For a more pronounced improvement Magnesium Alloy ($2500-$4000) or carbon-fibre ($4000-$5000) are the materials of choice for WSBK and GP teams and look just as trick as they perform.
Other Add-Ons
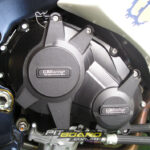
The majority of race series now require high strength engine case covers to be fitted, as modern OEM covers are very fragile, and also a shark fin rear sprocket guard to prevent “Daryl Beattie syndrome” (No toes). Damaging engine cases in a crash will almost definitely result in a serious amount of oil on the track, which is dangerous for other competitors and creates a lot of clean up work for the marshals. Kits are available from Vortex, GB Racing, Woodcraft, Yoshimura and others ($250-$500) and while you are at it get some rear stand swingarm bobbins ($40-$80).
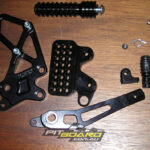
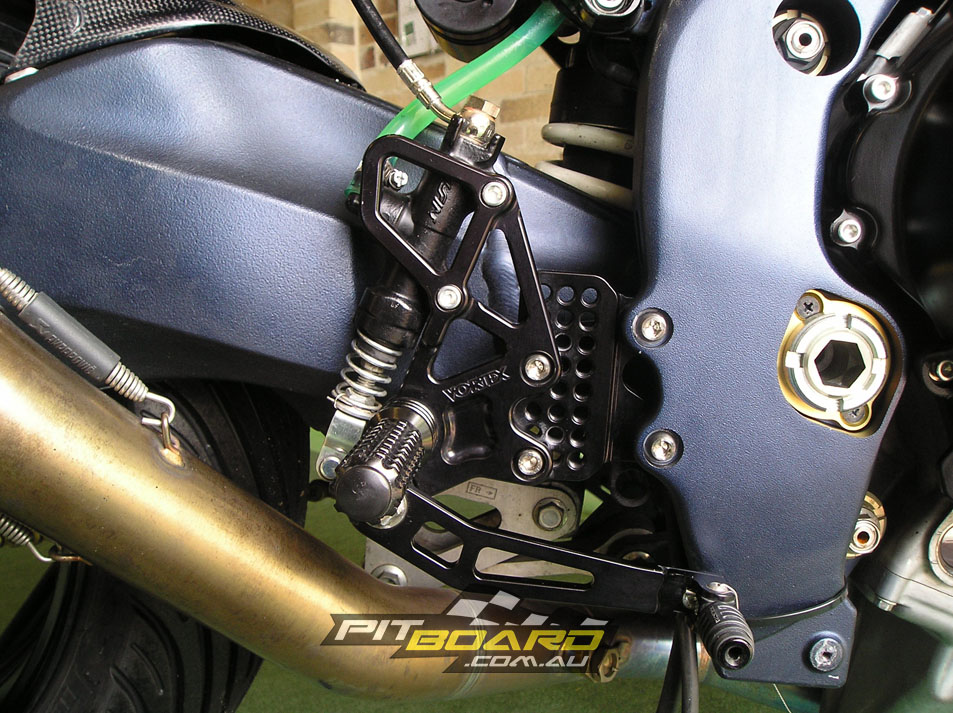
To protect the expensive OEM items and allow increased adjustability, you should look to replace the standard handlebars with aftermarket clip-ons ($150-$250) and swap OEM footpegs with adjustable rearsets ($350-$800), from Vortex, Renthal, Woodcraft, Yoshimura, Sato or similar. I also prefer some grips with a little more bite and find the Renthal dual compounds to work very well ($25).
While not essential a 520 chain conversion kit ($250-$400) will reduce power losses to the rear wheel and allow a wide choice of gearing options, as this is the most popular pitch for racing world wide. A lot of national series run a control tyre at the moment, which means you don’t have to worry about making a choice and prices average around $550 per set.
If you do not need to run a control tyre, then some brands can be picked up for around $480/set fitted and you would expect to go through a minimum of two sets per race weekend. Also keep in mind that you will need spare tyres in reasonable condition for practice days, so it’s advisable not to race them until they are completely finished. The last thing you want to do is be trying to race on completely shot tyres, then shell out for a brand new set just for practice. It’s far better to partially use one extra set of tyres on race day and leave yourself with enough rubber for your next practice session.

Lockwiring
Finally on the bike preparation front, all race bikes are required as a minimum to have the following items lockwired – oil filler cap, oil filter, sump plug, radiator cap and front brake calliper bolts. I like to use a hose clamp around the oil filter, and “R” clips through the caps and calliper bolts, this allows easy removal without having to rewire everything each time.
Check out how to lockwire your bike here…
Riding Gear
Before you get out on track you are going to need some decent protective clothing. The price of leathers has come down significantly in the last decade and reasonable quality kit is now available for a much more affordable price ($500-$800). If you want something with a bit more style and comfort then you can upgrade to some premium brand Leathers from Dainese, Alpinestar, Spidi, or similar ($1200-$1800). For those who are a bit different in body shape or just want a custom design or perfect fit, made to measure leathers are produced locally by specialists such as Ricondi, Trinity Racewear, Quin Leathers or Tiger Angel ($1500-$2500).
A back protector ($100-$350), gloves ($100-$400) and boots ($250-$600) are all mandatory and you should always shell out on the best kit you can afford in this area. Trying on a range of brands and styles is a good idea, as they all have a slightly different fit and some will suit your individual body shape better than others.
The last and most important item is a quality helmet. If you’ve been around motorcycles for a while, then you’ve no doubt heard the phrase, “If you’ve got a $10 head, wear a $10 helmet”. Surgeons are pretty skilled these days and can repair most things you are likely to break in an accident, however your brain is not on that list. Spend some dollars and protect it. In my personal opinion, if you can’t afford a $500 helmet as a minimum, then you can’t afford to go racing. Cheaper lids do pass all the safety criteria, or you wouldn’t be allowed to buy them, however they tend to be heavier, which increases the whip force when your head smashes into something solid (like bitumen).
Top range helmets, think Shoei, Arai, AGV ($600-$1200) are lighter, more comfortable, afford a better field of vision and have had the R&D dollars spent to ensure the best possible fit and protection.
Equipment
Additional equipment you will require to go racing includes a trailer or van to get the bike to and from the track, and what you choose here will generally reflect what you can afford and also what suits your requirements away from racing. I use a box trailer ($800-$1400) with a runner and tie down points, and chose this option as it does double duty for garbage and mulch shifting purposes. A fully enclosed trailer ($3000-$6000) would be ideal if you want everything locked up and protected and also allows you to leave tools and parts stored in the trailer at home rather than having to unpack after every meeting.
Check out our transportation tips here…
Front and rear stands are mandatory ($250-$450/set) and I’d recommend going with a head lifting style front stand, which allows easy removal of the front forks for suspension adjustment.
Tyre warmers ($250-$800) are really an essential item these days. Modern race tyres are designed to run only one to three heat cycles, so you need to get them warm, and keep them warm all day to reduce the negative effects. They are also intended to run off tyre warmers and will cold tear badly if you try to ride without heat in them. Trust me, your reduced tyre bill will pay for the warmers after only a couple of race weekends and going out on pre-heated rubber will also dramatically reduce the chances of a first lap crash.
Other desirable equipment includes a decent tool kit, crash spares including clip-ons and footpegs as a minimum and preferably spare fairings and screen, brake levers, throttle tube and grips. Also include cable ties, lock wire, duct tape, spare knee and toe sliders, tinted and clear visors, ear plugs, alternative sprockets, spare rims with wets, chairs and table, extension leads and power boards, Loctite and a selection of nuts bolts and washers.
